Our Location
304 North Cardinal St.
Dorchester Center, MA 02124

Written by Mark Reynolds – 12 years as lead installation specialist at Havenseek Mirror, helped over 1,200 homeowners and contractors complete hassle-free bathroom upgrades across the US.
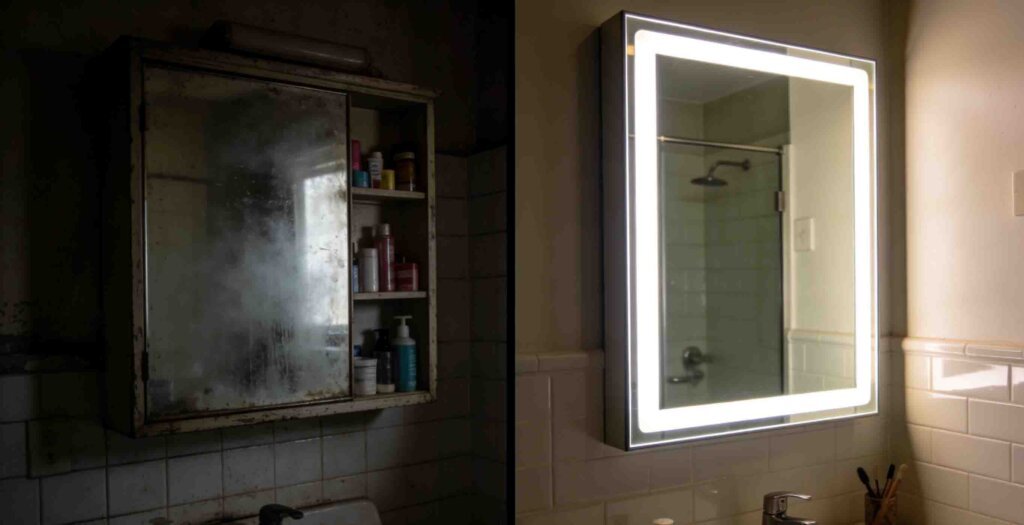
Every morning, millions of Americans stand in front of a dim, foggy, or damaged medicine cabinet mirror and think, “This bathroom feels so dated.” If that sounds like you, you’re in the right place. The great news is you don’t have to live with it—or spend thousands on a full remodel. A targeted LED medicine cabinet mirror replacement can completely transform your daily routine with brighter, clearer, and more functional lighting.
I’ve spent over a decade helping homeowners just like you upgrade to modern LED medicine cabinets. In that time, I’ve seen how this single change delivers huge value: better grooming light, no more wiping away steam, energy savings, and a bathroom that finally looks current. Best of all, when you focus on medicine cabinet mirror replacement instead of replacing the entire unit, you typically save 40–70% on cost and cut installation time in half.
This comprehensive guide walks you through every detail—from deciding if your existing cabinet is worth keeping to the final switch flip that lights up your new LED medicine cabinet. I’ll share the exact steps I’ve used on hundreds of jobs, the mistakes I’ve seen (and fixed), and the tips that make the difference between a frustrating weekend project and a smooth, satisfying upgrade. Read to the end—you’ll walk away confident and ready to tackle this yourself.
Old mirrors don’t just look tired—they create daily frustration. Poor bulb placement casts shadows that make applying makeup or shaving accurately almost impossible. Steam from showers leaves the glass foggy for minutes, forcing you to wait or wipe constantly. Over time, moisture seeps behind the silvering, causing those ugly black spots around the edges that never go away.
Many homeowners assume the only fix is a complete cabinet swap plus drywall work. But in reality, the cabinet body and shelves are usually perfectly fine. Targeting just the medicine cabinet mirror replacement with a modern LED medicine cabinet front solves every issue without the expense and mess.
| Upgrade Type | Average Material Cost (2026) | Labor/Time | Total Estimated Cost | Disruption |
|---|---|---|---|---|
| Full Bathroom Remodel (new vanity + cabinet) | $4,000–$12,000 | 1–3 weeks | $8,000–$20,000 | Very High |
| Complete New Medicine Cabinet Install | $500–$1,200 | 4–8 hours | $800–$1,800 | Medium |
| LED Medicine Cabinet Mirror Replacement Only | $350–$750 | 2–4 hours | $400–$900 | Low |
| Your Potential Savings | 40–70% vs full replacement | Minimal | ||
These numbers are based on real quotes I’ve provided across the country. The savings add up fast when you keep the existing structure.
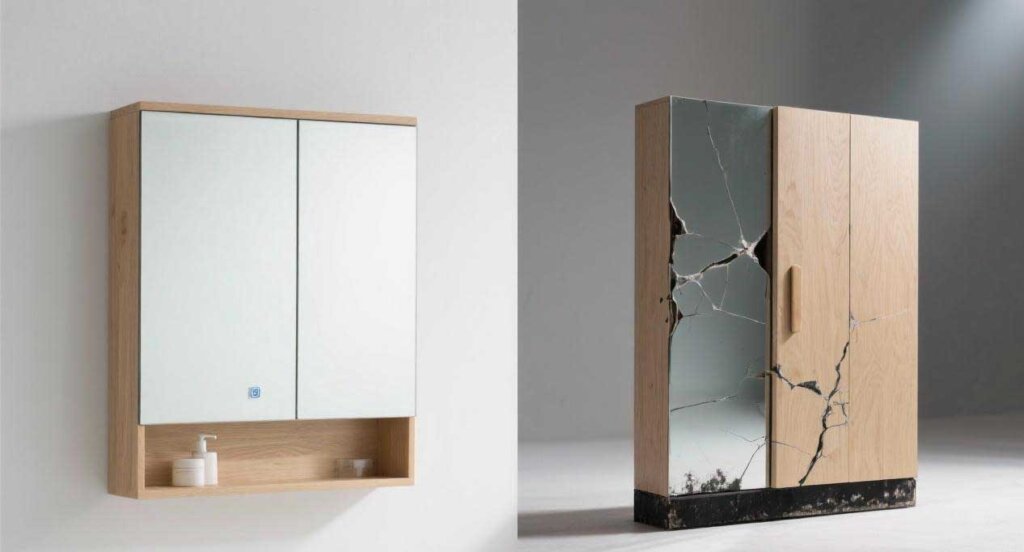
Open the door and take a close look inside. Check for:
If everything feels solid and the interior is clean, you’re 90% likely to reuse it successfully. Most cabinets built after 1990 hold up well.
Both types work great for LED medicine cabinet mirror replacement; surface-mount is usually 30–60 minutes faster.
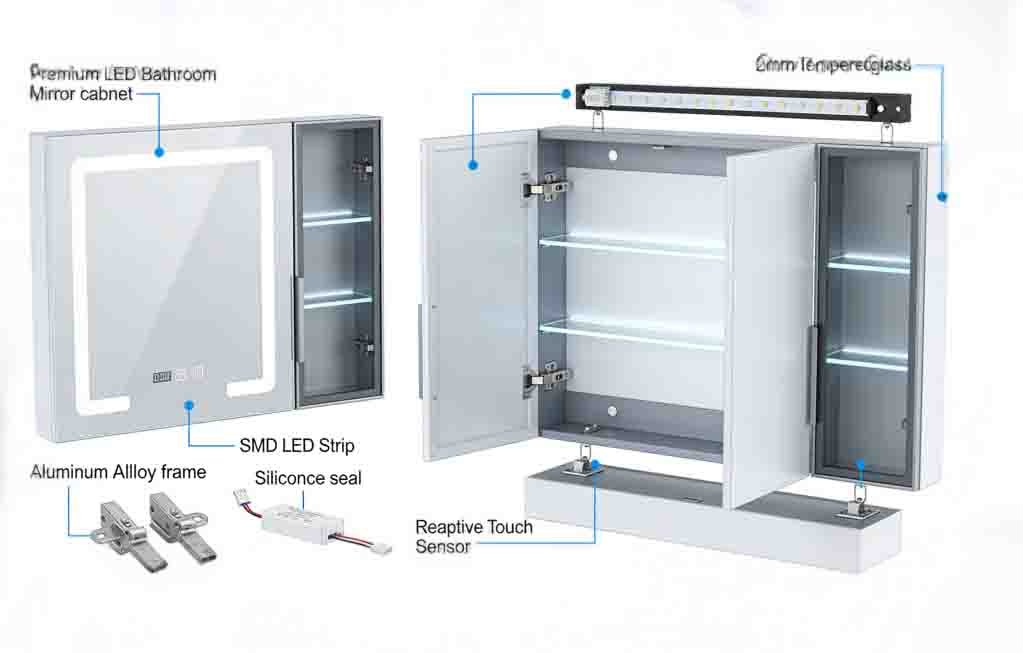
Don’t settle for basic. Look for:
| Cabinet Width | Best Bathroom Size | Typical Features Recommended | Average Price Range |
|---|---|---|---|
| 16″–20″ | Powder room / small guest bath | Single door, basic LED + defog | $350–$500 |
| 22″–26″ | Standard family bath | Dimmable, 3 colors, interior lights | $450–$650 |
| 28″–36″ | Primary suite / double vanity | Full features + outlets inside | $600–$900 |
Hardwired looks cleaner and meets most codes, but plug-in models are perfect if you want zero electrical work—just use an existing outlet behind the cabinet.
Tip: Add photos and notes to your phone. Measure three times to avoid returns.
Turn off power at the breaker and verify with tester. Wear cut-resistant gloves when handling glass. Have a second person for lifting. If wires look old or frayed, call an electrician—no exceptions.
If it’s painted in place, score deeply around the entire perimeter. Use thin wooden shims to work gaps gradually—patience prevents wall damage.
Most bathrooms have a GFCI-protected circuit. Your new LED medicine cabinet will draw very little power (10–30 watts), so existing wiring is almost always sufficient.
Twist tightly, secure with wire nut, wrap with tape. Tuck neatly into box.
Any signs of aluminum wiring, no ground wire, or adding new circuits—don’t risk it.
Use shims behind if wall isn’t flat. Check door swing and closure before final tightening.
Clean mirror with microfiber and ammonia-free cleaner. Adjust shelves for your products. Step back—admire the transformation.
Sarah had a 24-year-old recessed cabinet with desilvered edges. She reused the body, installed a 24×30 LED unit herself in 3 hours. Result: “The lighting is incredible—makeup looks perfect now.” Saved $900 vs contractor quote.
Mike worried about drilling tile. We chose heavy toggles—he finished in 2.5 hours. “Defogger alone is worth it in humid summers.”
Two 30″ units side-by-side. They measured carefully, hit studs perfectly. Total cost under $1,400 vs $3,500 remodel quote. “Biggest bang-for-buck upgrade we’ve ever done.”
These real examples (names changed) show what’s possible with good planning.
Absolutely—most modern LED medicine cabinets are designed as drop-in replacements for existing frames or full door swaps.
Expect $350–$900 depending on size and features. Well worth it for 10+ years of daily use.
No—most handy homeowners complete it in 2–4 hours. Hire help only for complex electrical.
Only if it has built-in dimming. External wall dimmers can damage LEDs unless compatible.
LEDs draw very little power. If you currently have any lighting, you’re almost certainly fine.
Quality brands offer 5–10 years on electrical components and lifetime on mirror corrosion.
Yes—many premium models include GFCI outlets and USB ports built in.
Microfiber cloth and mild glass cleaner only. Avoid ammonia or abrasives.
Yes—updated bathrooms consistently rank as top ROI improvements for resale.
Better morning routine—clear mirror, perfect lighting, no fog frustration.
After helping hundreds of homeowners complete their LED medicine cabinet mirror replacement, I can tell you this: it’s one of those rare upgrades that pays for itself in daily satisfaction within weeks. Brighter light, clearer reflection, modern style—all with minimal cost and effort.
Don’t put it off another year. Get a free quote in 12 hours or request free samples to see and feel the quality difference yourself. Head over to https://sellmirror.com/contact/ right now—your upgraded bathroom is closer than you think.