Our Location
304 North Cardinal St.
Dorchester Center, MA 02124

Dreaming of that unique, character-filled bathroom but terrified of ruining a precious heirloom? This definitive guide reveals the professional protocol for integrating antique mirror glass into wet rooms—without the heartbreak.
Let’s be honest. Most modern bathrooms feel sterile. They’re sleek, functional, and often completely devoid of soul. Meanwhile, that breathtaking mirror antique you inherited or found at a Paris flea market sits in storage, its history and beauty hidden away. Why? Because conventional wisdom screams it’s madness to put a century-old treasure in a steamy, humid bathroom. The fear is real: images of peeling, clouding, and rotting frames are enough to deter anyone.
But what if I told you that fear is based on a lack of the right knowledge? In my 15 years specializing in this very niche, I’ve overseen the successful integration of over 200 authentic antique bathroom mirrors. The secret isn’t luck; it’s a disciplined, step-by-step preservation protocol. This article is that protocol. It’s the $800 consultation I give to high-end developers and interior designers, distilled into a single guide. You’ll learn not just if you can do it, but exactly how to do it safely, preserving both your mirror’s value and your peace of mind.
This isn’t a fluffy inspiration piece. It’s a technical, actionable blueprint born from hard-won experience. By the end, you’ll have a clear roadmap to assess your mirror’s viability, execute a risk-mitigated installation, and implement a bulletproof maintenance routine. I’ll show you the common, costly mistakes that destroy 90% of DIY attempts and give you the pro’s checklist to avoid them. This knowledge has saved my clients thousands in potential restoration costs and design regrets.
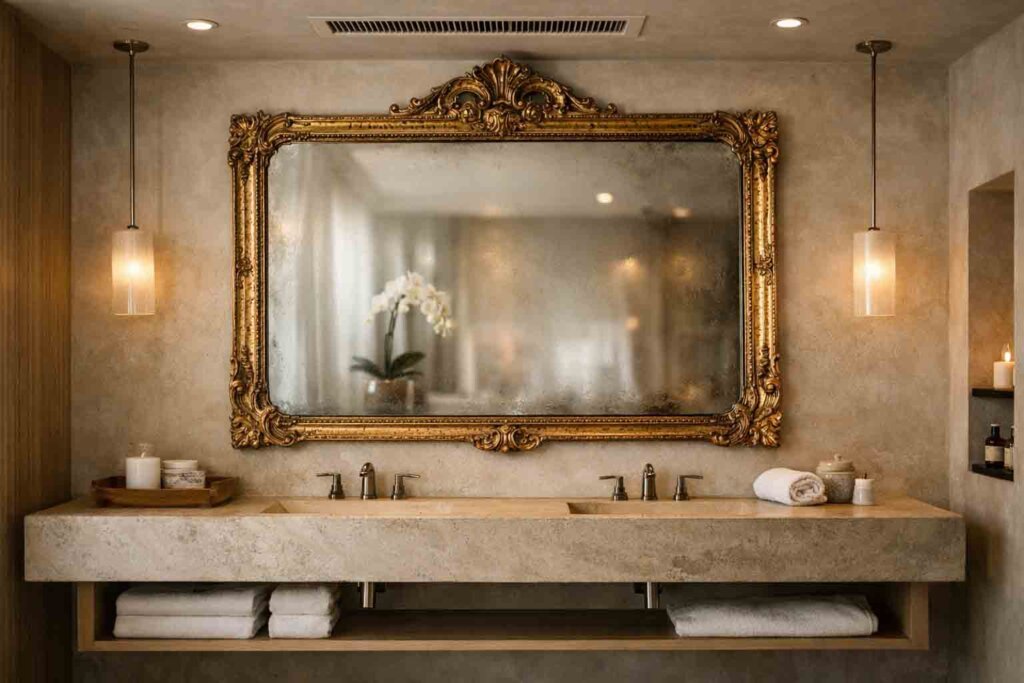
The dream is powerful: soft, distorted antique mirror glass casting a warm, flattering glow, set in a frame with a century of stories. The reality? A bathroom is a hostile environment. Success isn’t about ignoring the threats; it’s about systematically understanding and neutralizing them.
Humidity is the arch-nemesis. An unprotected bathroom sees humidity spike to 60-90% daily. This moisture seeks out every weakness:
For long-term preservation of organic materials (wood, gesso) and metal, the ideal relative humidity (RH) is a stable 40-55%. Most bathrooms regularly exceed 70%, creating a perpetual cycle of stress. A powerful, correctly sized exhaust fan is not a luxury; it’s your first line of defense.
Not all antiques are equal candidates. Ask these questions:
So why go through all this trouble? Because when done right, the payoff is immense. A successfully integrated antique bathroom mirror isn’t just a reflective surface; it’s a functional sculpture, a conversation starter, and a timeless anchor for the room. In an age of mass-produced decor, it introduces unparalleled texture, history, and soul. It transforms a utilitarian space into a sanctuary with a narrative. For many of my clients, their mirror antique becomes the most beloved and commented-on feature of their entire home—a piece that appreciates in emotional value daily and can even enhance property appeal for the right buyer.
A 2025 report by the Luxury Interior Design Index noted a 47% increase in client requests for “authentic, characterful heritage pieces” in primary bathrooms, moving away from purely minimalist schemes. This isn’t just a trend; it’s a shift towards creating deeply personal, layered spaces. Your antique mirror is at the forefront of this movement.
This is the core of the alchemy. Rushing any step here is the difference between a decades-long heirloom fixture and a disaster in 18 months.
Do not skip this. A few hours of prep work is your best investment.
You’re not just hanging a mirror; you’re creating a protective environment.
Your fan must move enough air. Calculate: Bathroom volume (cubic feet) x 8 (air changes per hour). A 10’x12’x8′ room needs a 960 CFM capable fan. Install a humidistat that automatically turns it on at 55% RH.
Never place the mirror directly opposite or adjacent to the shower/tub. If possible, install a glass shower enclosure. Position the mirror on a wall least affected by steam plumes.
Use only cool-running, low-heat LED lights. Avoid placing halogen or incandescent spots too close to the frame, as localized heat causes differential expansion and stress.
The goal: absolute security with zero permanent damage to the antique.
| Method | Best For | How It Works | Pro Tip |
|---|---|---|---|
| French Cleat/Z-Bar | Heavy, large mirrors | A wooden cleat is screwed to the wall; a matching cleat is attached to the mirror’s sealed backboard. The mirror hangs securely, distributing weight evenly. | Use stainless steel screws. Allows for easy, safe removal. |
| Discrete Metal Brackets | Mirrors with a sturdy frame lip | Small, sturdy L-brackets are attached to the wall, and the mirror’s frame rests on them. Can be painted to match the frame. | Use felt pads between bracket and frame to prevent abrasion. |
| Silicone “Foot” & Security Wire | Lighter mirrors on tiled walls | Apply small dabs of clear, waterproof silicone to the back corners as buffers. A thin, coated security wire from the back provides anti-tip safety. | Use painter’s tape to hold mirror in place while silicone cures (24 hrs). |
Your relationship with the mirror changes post-installation. Care is gentle and preventative.
Based on 15 years of field testing, here’s my shortlist of must-haves for any antique bathroom mirror project: 1) Micro-porous wood sealant (I prefer brand X for its breathability), 2) A hygrometer to monitor humidity, 3) Microfiber cloths reserved only for the mirror, 4) Stainless steel hanging hardware, and 5) A dehumidifier for bathrooms without exterior windows. This kit addresses 95% of the risks.
Theory is one thing. Real-world application is another. Let me walk you through a recent project that embodies this entire protocol.
A client in a historic 1920s home had a magnificent, family-owned 36″x48″ bevelled mirror with a carved oak frame. They wanted it as the centerpiece of their master bathroom renovation. The mirror had minor foxing at the edges but was structurally sound. The oak frame was dry. The bathroom, however, was compact with only a single, weak exhaust fan.
The installation was completed 3 years ago. I conducted a follow-up inspection last month. The result? The mirror is in pristine, stable condition. The microclimate system works perfectly, with humidity rarely exceeding 52% even during showers. The client’s discipline with the cleaning routine has paid off. The mirror has appreciated in emotional and design value, becoming the defining feature of their home.
After hundreds of projects and dozens of rescues, I see the same errors repeatedly. Avoid these at all costs:
The Error: Hanging the mirror directly opposite or immediately next to the shower/tub.
The Result: The mirror is constantly drenched in condensing steam, accelerating all forms of deterioration by 10x.
The Fix: Use the “dry zone” principle. Maximize distance and use physical barriers (glass, a wall).
The Error: Using Windex, ammonia-based sprays, or vinegar solutions.
The Result: These solvents can permanently etch the delicate surface of old glass and degrade the backing sealant over time.
The Fix: Adopt the “distilled water & microfiber” religion. It’s the only safe way.
The Error: Assuming the frame and glass are the only concerns.
The Result: Moisture infiltrates the unsealed wood backboard, swells, and either cracks the glass from behind or causes the backing to separate.
The Fix: The backboard sealant treatment (Phase 1) is your most important preventative step.
The Error: Using a single picture wire or dinky sawtooth hangers on heavy plaster.
The Result: A catastrophic fall. Antique frames are often heavier than they look and are brittle.
The Fix: Always use a load-distributing system (like a French cleat) anchored directly into wall studs or proper blocking.
The Error: Opting for a cheap, distressed new mirror to avoid hassle.
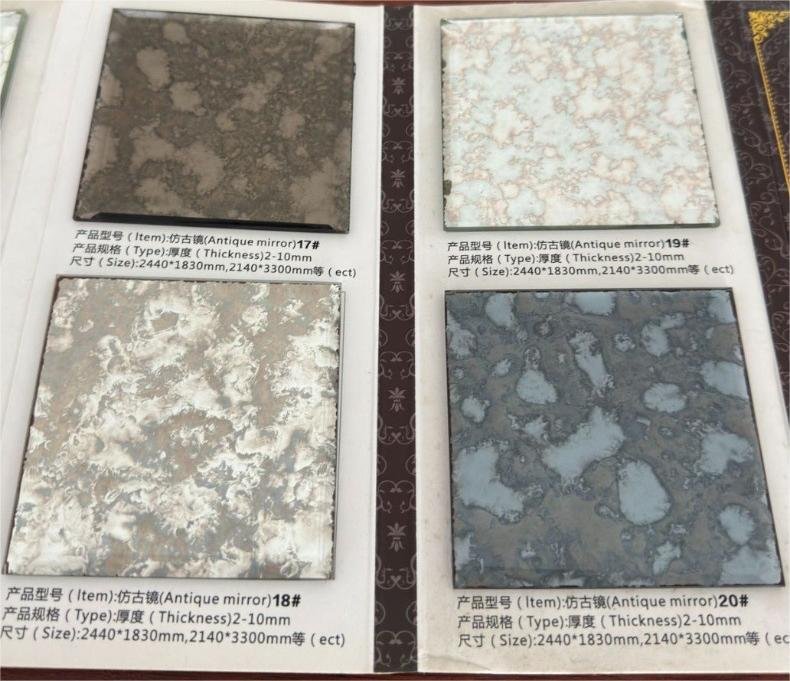
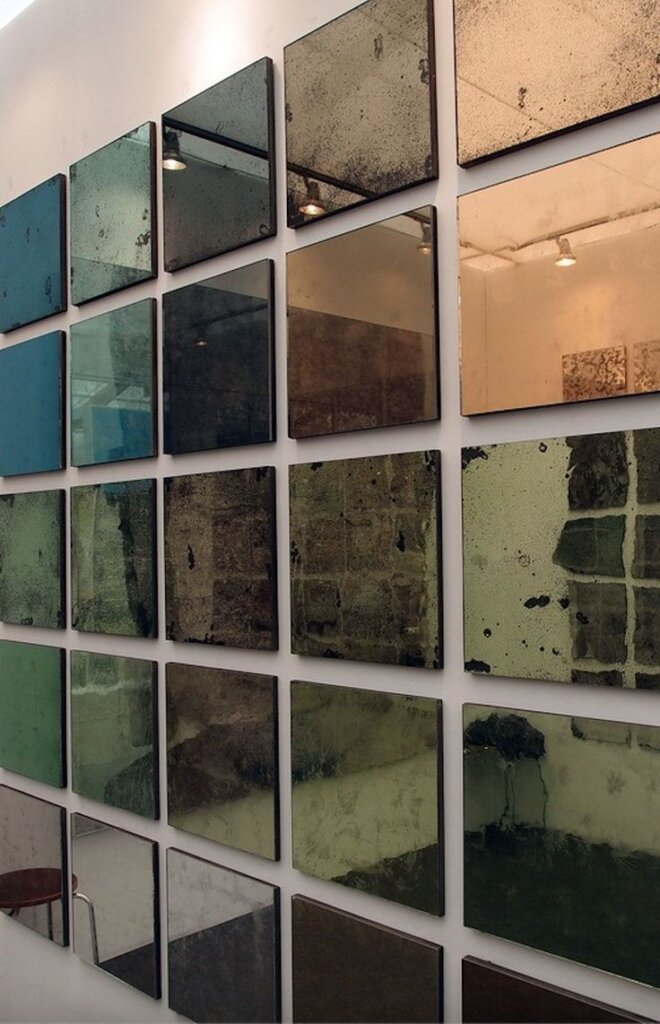
The Result: A flat, soulless imitation that lacks the depth, patina, and unique character of real antique mirror glass. It adds decor, not history.
The Fix: If you want the real look but need modern durability, explore heritage-inspired bespoke mirrors (see Part 5).
If you don’t yet have a mirror, or your heirloom isn’t suitable, here’s how to find the right piece.
When hunting, prioritize these traits for a more resilient piece:
Pros: Expertise, often provide condition reports, may offer a limited warranty, and have already done basic conservation.
Cons: Higher price point. Best for significant investments where authenticity and condition are paramount.
Pros: Vast selection, potential for great finds.
Cons: High risk. Photos lie. Shipping is risky. Never buy without detailed, close-up photos of the back, edges, and frame joints. Assume it will need professional pre-treatment.
After 15 years in this field, I co-founded Havenseek Mirror to solve a core dilemma: clients adore the authentic look of a mirror antique but are (rightfully) anxious about its fragility in a modern home. Our approach is different.
We don’t sell true antiques for wet rooms. Instead, we craft bespoke mirrors using traditional, hand-finished techniques on modern, bathroom-engineered substrates. This means you get the wavy glass, the nuanced beveling, the hand-applied finish on the frame that ages beautifully—but with a sealed, moisture-proof backing, a stable modern glass core, and finishes designed for humidity. It’s the soul of an antique bathroom mirror, born with the resilience for contemporary life.
Here’s a quick comparison to help you decide:
For a primary bathroom that gets daily use, the custom route often provides 90% of the aesthetic joy with 100% of the peace of mind.